Diễn Đàn » English Club

The Essential Swimmer

20 trả lời, 7.229 lượt xem — Trang 1 / 1
.
The Essential Swimmer

By Steve Tarpinian


http://images.ecampus.com/images/d/864/1558213864.jpg
Đăng nhập để trả lời
0
<Bài viết đã được chỉnh sửa lúc 2006-06-01 17:23:53HongYen>
.
Freestyle Technique


The Six Aspects fo Freestyle Technique


1. Arm cycle: each cycle consists of five phases entry, elbow flexion (catch), pull (adduction), release (and round-off), and recovery

2. Rotation: long axis rotation and shoulder rotation

3. Body position: staystreamlined to reduce drag

4. Kicking: important in maintaining proper rotation

5. Breathing: a result of proper rotation

6. Push off: sets the stage for the lap


* Note: I will discuss these six aspects of freestyle technique one at a time and explain how to perform each one properly. However, it is important to realize that, when swimming , all are being performed in a continuous cycles.

Page 9
Đăng nhập để trả lời
0
1. Arm cycle:


The arm cycle can be broken down into five phases: entry, elbow flexion (catch), pull (adduction), release (and round-off), and recovery. Since freestyle uses a continuous arm cycle, there is no first or last phase. None of these phases is isolated. If one phase is performed incorrectly then the entire stroke suffers! In swimming, as in many sports, you are only as strong as your weakest link.
Đăng nhập để trả lời
0
entry


Entry occurs when you slip your hand into the water and extend your arm forward. Your goal is to enter as smoothly as possible and really extend your arm forward to prepare fot he next stage, elbow flexion.

During entry, slip your hand into the warter 8 to 12 inches (20 to 30cm) in front of your shoulder, making approximately a 45-degree angle with the water's surface. Once your hand is in the water, extend your arm forward. This extension comes from rotating your body, extending your arm, and elvating your shoulder. As your hand extends forward, rotate your arm toward your midline so that your palm becomes parallel with the bottom of the pool.

As you extend your arm, think of sliding your hand forword just under the surface of the water. This will create lift. Often swimmers dive on drive the hand down. This action causes two problems. First, you get little or no lft, and second, you get into a poor position for the next phase, thereby, compromising power.

Đăng nhập để trả lời
0
elbow flexion (catch)


Elbow flexion

Your wrist can bend slightly to initiate the bending of your elbow-just be sure to straighten it after your elbow is fully bent. This is not a powerful movement, but it is a movement that sets up the stroke and should not be rushed.

Catch is a mere descriptive term for this movement that has you bending your elbow and rotating your shoulder at the same time.

Note: You must turn the shoulder in as bend the elbow. This is what sweeps the hand out and gets you in the position. Take your time learnign elbow flexion -it will pay big dividends. It sets the stage for the power phase, the pull (or adduction). The importance of elbow flexion is an agreed-upon fact among coaches. Swimmers can sacrifice other aspects of technique and still be great, but a great swimmer cannot get away with poor elbow flexion-in any of the four strokes. So if you learn anything, learn to avoid the common error of dropping your elbow and pulling with only your hand. Keep your elbow raised, bend it, and make poweful use of your entire forearm.


Đăng nhập để trả lời
0
Swimming Stroke Technique Training

from Peak Performance Online

An overview of the basics of technique for all strokes (plus a bit extra) and specific training needs

The efficiency of your swimming stroke is the key to success as a competing or training swimmer. An efficient stroke will significantly reduce wasted energy output through less drag in the water and a cleaner execution of hand and arm entry and recovery. Thus that little extra energy may provide you with an overall faster time. When your energy resources are depleted and you're hanging on to the end of your race, you will be the winner if you can hold your technique to that last tenth of a second. Every swimmer knows how easy it is to let one's technique drop off as you become more fatigued throughout a race - that burning sensation in the shoulders as you try to hold together your last few strokes to the wall is the hardest part of the race.

With regard to training for competitions, the season can last for up to 10 months or more, depending on whether you are at county, national or international level. In general, the season's training will reflect the level of the club or squad you are training with. The season will be geared around the county or regional championships, the Grand Prix circuit, the nation short- and long-course championships, the European, World or Olympic Games or the World Cup Circuit. Whatever your level, this article aims to cover the different types of training sets/sessions you should experience. Your individual ability and/or standard will determine the actual proportional breakdown of these sessions or cycles throughout the swimming season.

Technique


When considering swimming technique for any stroke, analysis should follow the format described below, in this order:
1. Leg kick
3. Timing
2. Arm cycle
4. Breathing

The leg kick will control the body position in the water, while the arm cycle will provide the propulsive force. The timing between the two is vital to the efficiency of the given stroke in order to provide a greater speed through the water with minimum wasted energy. Finally, breathing tech-nique should be analysed to ensure that when you breathe your overall technique is not disrupted in any way that would cause a breakdown in efficiency.

Freestyle


The main propulsive force of the freestyle stroke is the arm cycle. The legs add only 10% of total speed through the water, depending on whether you use a 2-, 4-, 6-, or 8-beat kick. The main function of the legs is to help keep the body balanced and efficient to allow the arms to do their work and keep the body moving when the arm cycle is at its weakest point. The following list briefly illustrates the arm cycle:

Recovery
Elbow leaves the water first, with a high elbow, hand relaxed directly under the elbow, trailing fingers on the water, then reach forwards to the entry position

Entry & Catch
Thumb first, hand slightly cupped, reach further forwards and out (laterally) to 'catch' the water to prepare for the out sweep - dropping the shoulder (upon the reach) slightly will help in the 'catch' and also in the recovery of the other arm

Out sweep
Press the water laterally to the body with only slight elbow flexion and begin to rotate the hand at the wrist medially

In sweep
Press the water towards the hips through further flexion of the elbow and wrist as you feel the body being pulled over the hand

Press
With the hand at the hip and palm facing towards the feet, press the water back by extending the arm to approximately 90% of full extension, keeping in line with the body to reduce drag. The arm is ready for the recovery, elbow first!


Backstroke


Because of the required shoulder roll during backstroke swimming and a slightly weaker arm cycle, the legs play a more important part in adding a propulsive force to the stroke. The key, however, is to ensure that the feet work just under the water surface and not above it, to ensure that the full kicking movement is propulsive and not against thin air. The arm cycle is described as follows:

Recovery
Thumb first, arm fully extended, rotate the arm laterally through the shoulder joint, keeping in line with the body, gradually turning the hand laterally at the wrist ready for the entry. Allowing the opposite shoulder to drop will lift the recovery shoulder to help balance the stroke and create a more powerful propulsive phase

Little finger first, drop the shoulder to allow a reach and 'catch' the water with the hand cupped. The arm should flex slightly at the elbow to assist in the catch

Down Sweep
Continue to flex the arm at the elbow as you press laterally, then downwards as you pull the hand towards the shoulder and chest, keeping that shoulder in the drop position

Press
With the arm close to the body, press the water towards the feet in line with the body, ensuring full arm extension is achieved

Butterfly


This is a stroke where timing of the kick and the arm cycle are paramount. An inadequate butterfly technique can waste a huge amount of energy because of the double arm movement on recovery and propulsion, and also the double leg kick. Practice makes perfect, and the more efficient you can make this stroke the more power you will be able to generate where it is needed.The arm cycle is as follows:

Recovery
Both arms break the water simultaneously, hand and forearms first, the arms swing outwards, elbows slightly flexed as they both continue to swing round and meet forward of the head, thumb and fingers first

Entry & Catch
Fingers first, the hands cup and catch the water simultaneously in preparation for the out sweep (the big kick finishes)

Out sweep
Together, the arms press laterally, and the arm begins to flex at the elbow (the small kick starts)

In sweep
As the arms continue to flex, the hands turn medially and press towards the body (in small kick finishes)

Press
As the hands come close to the body, they then press towards the feet, fully extending the arms at the elbow in preparation for the quick 'flick' out of the water and to recovery (the big kick starts)

Breaststroke


The final competitive swimming stroke to analyse is, like butterfly, controlled by the efficient timing of the leg kick and arm cycle in order to give the most effective end result - a faster swim! The arm cycle is as follows:

Reach & Glide
Both hands, thumbs together, reach forward, fully extending the arm at the elbow (the leg kick starts to push back to continue the forward movement) - the arms will stay in this position until the kick is completed by the feet touching

Out Sweep
The hands rotate laterally, cupped to catch the water, and press laterally with slight flexion of the arm at the elbow

In Sweep
The arms continue to flex at the elbow as the press on the water is now turned medially towards the chest (the legs flex at the knee and hips to prepare for the kick)

Recovery

Once at the chest, the hands meet in the centre, elbows flexed close to the chest to reduce drag, and recover together over the water at the beginning, but then dive in to the reach and glide

Training Sets/Sessions

Depending on which training cycle you are in, you will often cover varying sessions on endurance/ stamina work and speed/power work. There are hundreds of different swim sets you could carry out through a certain training cycle. Below are examples of what to include in those sessions, at what intensity, and how much rest should be given. These examples are to be used as a 'main set' for a single training session. A quality warm-up and 'lead-in' set should be completed first, followed by a recovery set and cool-down, depending in the length of the session, training cycle, etc.

Endurance

Any competitive swimmer (or serious health-club swimmer) must incorporate this type of training throughout their season or given cycle. This will build their physiological aerobic base from which to develop more specifically for their needs, whether it be simply fitness or distance-based swims (400m or 1500m) or sprint-based swims (50m or 100m).

Basic endurance

This involves working at a heart-rate level of 65-75% HR max for a period of 15-60 minutes. Rest within the sets should be between 10-30 seconds depending on the distance repeats you are swimming. Examples include:

1. 20 x 100m repeats 10-15sec RI 60-75% HR max (2000m)
2. 5 x 400m repeats 20-25sec RI 60-75% HR max (2000m)
(RI = Rest Interval)

Threshold endurance

This involves working at a heart rate level of 80-85% HR max, for a period of 15-45 minutes. Rest within the sets should be between 10-30 seconds depending on the distance repeats you are swimming. Examples include:

1. 10 x 200m repeats 15sec RI 80-85% HR max (2000m)

Overload endurance

Occasional endurance sets should involve this type of training, whereby you swim at a heart rate level of 85-90% HR max for a period of 15-30 minutes. Rest intervals within the set should be no longer than 30 seconds depending on the distance repeats you are swimming. The main aim of this type of training is to work for a solid length of time at a high intensity with little rest to ensure the working muscle groups achieve overload. As you know, without achieving overload, progression will not occur within a given time scale. Examples include:

1. 5 x 200m repeats 15sec RI 85-90% HR max
10 x 100m repeats 10sec RI 80-85% HR max (overall: 2000m)
2. 3 x 400m repeats 20-25sec RI 85-90% HR max 4 x 300m repeats 15-20sec RI 85-90% HR max (overall: 2400m)

Sprint training adds the anaerobic fitness base to the aerobic base you have developed with your endurance training. It works on the two anaerobic energy systems - the creatine phosphate energy system and the lactate energy system. Training involves short, fast repeats with good rest intervals to ensure you can overload both these energy systems. The additional benefit of sprint training is muscle adaptation to the speed-type exercise, as well as the aerobic benefits trained earlier. Working the fast-twitch muscle fibres will increase their number and size in a given muscle as well as the speed of excitation. The following examples of training sets are to be used as a 'main set' as with the previous endurance examples.

Lactate tolerance

This involves working at a heart rate level of 90-95% HR max, with substantial rest periods within the given set. The aim is to work close to maximum speed and then to rest (for between 3 and 5 minutes) in order to give time for some lactate to be broken down and eliminated. Examples include:

1. 6 x 50m repeats 4min RI Maximum pace
2. 4 x 100m repeats 5min RI Maximum pace

http://www.howtobefit.com/swimming-stroke-technique.htm

Đăng nhập để trả lời
0
<Bài viết đã được chỉnh sửa lúc 2006-05-31 17:41:23HongYen>
Swimming Stroke Technique Training


http://www.endlesspools.com/index.html
Đăng nhập để trả lời
0
Total Immersion Swimming


http://www.totalimmersion.net/2005articles/january/novak.html
Đăng nhập để trả lời
0
1. Arm cycle: each cycle consists of five phases entry, elbow flexion (catch), pull (adduction), release (and round-off), and recovery


Phase 3 - Pull (adduction)

The pull or adduction is the power phase of the stroke. It is an accelerating movement and causes the majority of your forward propulsion. Literally, adduction is the movement of a limb toward the midline of your body. In this case I actually mean along your midline.

To pull you should-while keeping your elbow bent and using your forearm and hand as one large paddle-depress your shoulder and employ your back muscles to bring your arm and hand past your swimsuit. As your hand passes your chest, use your tricep muscles to extend your arm (elbow straight) for the finish of the pull phase.

Although your hand should pull through ans S-sharped pull pattern, to find "still" water for greater resistance, you do not need to consciously do this. Good long axis rotaion will cause the S-pattern. (I have found that consciuosly working on an S-pattern distracts all beginning, all intermediate, and some advanced swimmers. Your effort and time are much better spent working on rotation-see this chapter's next section.) Be careful not to pull your arm too far under your body. Underwater video footage is very helpful fo analyzing this phase.
Đăng nhập để trả lời
0
tricep muscles


The Triceps Brachii has three heads which connect the humerus and scapula to the forearm bone called the ulna. These heads are known as the Lateral, Medial, and Long heads.

The Lateral head is located on the outward facing side of the humerus. This head is most responsible for the horseshoe shape of the Triceps.

The Medial head is located towards the midline of the body.

The Long head along the bottom side of the humerus and is that largest of the three heads.


Functions The primary function of the Tricep is to extend the elbow (straightening the arm).

The secondary function of the Tricep is fulfilled only by the Long head of the muscle, which is the bring the arm down towards the body (adduction). The Tricep shares this function with the Latissimus Dorsi.


http://www.fitstep.com/Advanced/Anatomy/Triceps.htm
Đăng nhập để trả lời
0
<Bài viết đã được chỉnh sửa lúc 2006-06-01 20:38:11HongYen>
1. Arm cycle: each cycle consists of five phases entry, elbow flexion (catch), pull (adduction), release (and round-off), and recovery


Phase 4 - Release (and round-off)

The release is the phase in which, once you have finished your pull and your arm can extend back no further, the arm relaxes for a clean exit, and the shoulder joint opens so that you can take a smooth and injury free recovery.

After finishing your pull (adduction), your palm should be turned in slightly so that it is facing your leg. This is your hand's natural position, and it allows for a relaxed,
clean exit, led by your pinkie. Once your hand has exited, turn out your palm slightly-as though you are throwing a ball. This turning-out of your hand is crucial to releasing your shoulder joint and preventing unnecessary strain on your shoulder.

If the release movement seems awkwark, try practicing with a ball or a tennis racket. Go through the motions of either throwing or hitting the ball. Notice how you turn out your hand on the wind-up. That turning-out comes from externally rotating your shoulder. This opens your shoulder joint, allowing smooth recovery. Although this is a small movement, do not minimize its importance. Not releaing can cause irreparable damage to your shoulder. Usually the pain comes after the damage, so always make sure you are releasing correctly.
Đăng nhập để trả lời
0
1. Arm cycle: each cycle consists of five phases entry, elbow flexion (catch), pull (adduction), release (and round-off), and recovery


Phase 5 - Recovery

Recovery is the bringing forward of your arm above the water. It is the link between the finish of the pull and the entry.

After the release, relax your hand and concentrate on bringing your elbow forward. As your elbow reaches your shoulder area, your forearm and hand come forward, ready to enter the water again. Try to relax your arm as much as possible.

Keep in mind that this is the only phase in which your arm gets a chance to rest. Sometimes it helps to think of the recovery as a reaction to the rest of the stroke-similar to a rubber band being stretched, then released. Be sure you do not have too much tension in your arm during the recovery. Play around with flopping your arm forward. This will help relax your arm.
Đăng nhập để trả lời
0
<Bài viết đã được chỉnh sửa lúc 2006-06-04 18:09:43HongYen>
2. Rotation: long axis rotation and shoulder rotation


2. Rotation: long axis rotation and shoulder rotation

At the same time that your arms are cycling through the five phases of the arm cycle, two types of rotation are taking place-long axis rotation and shoulder rotation . This is where many swimmers have problems; they do not rotate and, as you will see, they rob themselves of longer and more powerful strokes.

Long axis rotation (sometimes referred to as a "body roll") is a rotation of your entire body. Imagine a string attached to your spine and coming straight up through the top of your head. This string is your long axis. When rotating correctly, your entire body rotates back and forth among this axis in a segmented fashion: shoulders and chest, followed by torso, hips, and, finally, legs. This long axis rotation enables you to take longer and more powerful strokes by enabling you to reach out farther and gain power from your hips - as essential in good swimming as it is in other sports such as baseball, golf, boxing, and tennis. When good long axis rotation is present, you can almost feel the pull being initiated by your hips and legs.

Some swimmers swim flat, with no rotation, and therefore have weak, short strokes. A more common problem - among inexperienced and advanced swimmers alike - is rotating the upper body and not the lower body. This creates extra drag and is referred to as "fishtailing". As the nonrotating hips come out of the slipstream they create drag and slow you down. In some cases lower back inflexibility can add to problem. However, as you will see, flexibility can be increased.

Although it is possible to overrotate (long axis), I have never seen this problem. As a matter of fact, I frequently ask swimmers to overrotate (even flip over) to really feel the rotation along their entire bodies.

Strokes are more powerful when combined with good long axis rotation, in part because of the effects of sculling. Sculling is the act of moving a limb back and forth to create force at a 90 - degree angle to the movement. There is no question that simmers scull.

However, the important and practical question is: How do they do it? This sculling motion is sometimes referred to as the "S-pattern pull", because your hand moves through and S-pattern (as viewed from bottom of the pool). This outward-inward-outward sweep movement is confusing and next to impossible to teach beginner and intermediate swimmers. As I mentioned before, I prefer to not have swimmers think of sculling as a separate aspect of swimming. In freestyle and backstroke, sculling occurs naturally during the pull, if good body rotation along the long axis is present.

The other type of rotation which takes place simultaneously with the long axis rotation or body roll, is the rotation of your shoulders.

The shoulders rotate, in an oval or forward-shrug-type movement, with the stroke. During recovery your shoulder goes up and forward (biomechanically it is elevating); during the pull your shoulder goes down and ackward (biomechanically it si depressed). This “rotation”, if perfroemed correctly, allows you to get four to eight inches (10 or 20cm0 more from each stroke. Doing some standing, forward shoulder shrugs with a light (5 lb ro 2kg) dumbbell will help give you the feeling of shoulder rotation.

Rotation is a crucial aspect of swimming: It is basis for smooth breathing, long strokes, and power.
Đăng nhập để trả lời
0
2. Rotation: long axis rotation and shoulder rotation


.....

These swimmers were entering the water, catching that water and pressing the finger tips downward and getting the wrist up over the hand, and the elbow up over the wrist. The hand then follows a downward and backward path extremely close to a straight line. It was a most efficient stroking pattern to watch. I remember Robin Leamy, a former American Record holder, stating that this is how he attempted to swim free style over 15 years ago when I worked clinics with him. My thoughts then were that it may be OK for a sprinter like Robin, but not the best method for free style swimmers in general. Thorpe and Hackett aren’t sprinters and it is working amazingly well for them.

Is this new? I’m sure it isn’t totally new, but it is a refinement in a new direction at the minimum. I was impressed with the younger swimmers who had already mastered the technique. How do they teach this? Their role models are using the technique so there is some learning taking place through mental image copying. However I believe that they are doing a great job of teaching the new technique through the use of paddles. Finger tip type of paddles self teach getting the fingers downward into the catch and early stroke. I’m recommending reversing my black Han’s Paddles on the hand. The tapered end is forward, and the paddle fits on the fingers of the hand when reversed. This permits the swimmer to naturally press the fingers downward, and to raise the wrist above the fingers, and the elbow above the wrist. Swimming with the paddles on the fingers in this manner will automatically encourage the desired results. I would also use the fingers, hand, wrist, elbow drills to “memorize the habit” of entry. Standing drills, walking drills, and swimming drills emphasizing fingers in first and downward, hand & wrist follow and get over the fingers, then elbows enter next and get over the wrist. This drill can be done with the reversed Han’s Paddles, and it can be done without the paddles.

One arm drills, and other drills, can also be done in a similar manner to provide continuing variety but with the same goal in mind.

http://www.mplx.com/hans/whatsnew.html
Đăng nhập để trả lời
0
.....

Overview: Freestyle and backstroke are referred to the long-axis strokes, as you are rotating on the long-axis of your body while performing these two strokes. Hence, many of the same drills can be used for both strokes and/or combined into one drill.

Kicking
For freestyle, kick on your side with your bottom arm (the one closer to the bottom of the pool) extended straight out of your shoulder line above your head. Keep your palm facing down and your extended hand about 8 inches under water. The top arm (the one on the surface of the water) should be relaxed at your side. Maintain a head position as though you were swimming freestyle, with your head in line with your spine. Press your chest and armpit toward the pool bottom and your extended arm should feel weightless.

Single Arm (R, L)
Start with both arms extended out in front of your head while taking small kicks. After six kicks, begin an arm stroke with your right arm and take a breath to that side. Be sure to drive the left hip downward while focusing on right hand acceleration through the water and high elbow on the recovery. The right hand should enter the water thumb down and extend forward and down (about 8 inches under the water as you rotate back on your stomach. Take six kicks and take arm stroke to left side driving right hip downward. Continue to alternate between right and left arms.

Long-Axis Combo Drill
Alternate four strokes of backstroke with four strokes of freestyle. Drive the rotation of your stroke with your hips. Light easy rhythm. Don't muscle the water. This drillallows you to feel the similar rotation of backstroke and freestyle.

Catch-Up
When swimming Full Catchup freestyle, touch your hands in a streamlined position between each arm stroke. Keep your extended hands about 8 inches under the surface of the water for improved body position. Progress to simply exchanging hands in the "passing zone" extended in front. Concentrate on swimming in the front quadrant and keep a long, streamlined body line.

Finger-tip - Arm Pit
These drills emphasize a relaxed high elbow recovery. The finger tip drill is done by dragging your finger tips across the top of the water during the recovery phase of the stroke. All other parts of the stroke remain normal. Keep the hand and fingers relaxed during the recovery. The arm pit drill is done by running your thumb of the recovery hand up the side of your body until you reach your arm pit and then you enter the water as usual.

4/6/8-Kick Drill
Kick on your side for a count of 4, 6 or 8 kicks (or counts). Take one full arm stroke to switch to your other side for another 4, 6, or 8 kicks . . . etc. While on your side, focus on correct body position. When executing the switch, begin by lifting the elbow of the arm on the water surface (top arm) and recovering it over the line of your body. The extended arm (bottom arm) stays extended to maintain a streamlined body position, until the elbow of the recovery arm has passed over your head. Then execute a quick switch to your opposite side. Use core body muscles to rotate, while maintaining a hold of the water with your bottom arm.

Rhythm Drill
Single Arm freestyle with opposite arm at your side (see description above), executing 2 right arms and then 2 left arms. This takes some practice, but may very well become your favorite freestyle drill once you master it. Focus on rhythm and timing from the hips. Remember to take your breath with an arm extended.

Fist Swimming
Swimming with hands completely in a fist. Concentrate on body position, using your forearm in the catch and optimum elbow bend through the stroke. When you return to swimming with an open palm, your hands will feel as large as kickboards! Have fun and think Distance Per Stroke!

Golf
While swimming 50 repeats, calculate your "score" for each 50 by counting your strokes in both directions (one arm equals one stroke) and adding it to your time. For example: If you swim 50 freestyle with 20 strokes per 25 in a time of :40, you would have a score of 80 (20 + 20 + 40). Descend your score by taking less strokes and/or completing the 50 in less seconds.

http://www.swim.net/technique/strokes/drills/index.cfm?stroke=Freestyle
Đăng nhập để trả lời
0


Freestyle

In the freestyle (crawl), one of the swimmer's arms moves through the air, the hand turning palm downward ready to catch the water, elbow relaxed, as the other arm pulls under the water. The legs move in what has evolved in recent years as the flutter kick, an alternating up-and-down movement from the hips, legs relaxed, toes pointed, feet turned inward. Four to eight kick strokes per single arm movement are used. Proper breathing is very important in this stroke. One full breath can be taken in each arm cycle, with the swimmer inhaling through the mouth by turning the head to the side as the arm passes, then exhaling underwater as the arm comes forward again.
Đăng nhập để trả lời
0
<Bài viết đã được chỉnh sửa lúc 2006-06-06 05:50:44HongYen>


Freestyle
Đăng nhập để trả lời
0
Backstroke


The backstroke is essentially the crawl stroke but with the swimmer's head back turned to the water. Alternately, one arm is lifted, palm facing outward, from being the leg and is brought up behind the head while the other arm pulls the body through the water. A flutter kick is used.
Đăng nhập để trả lời
0


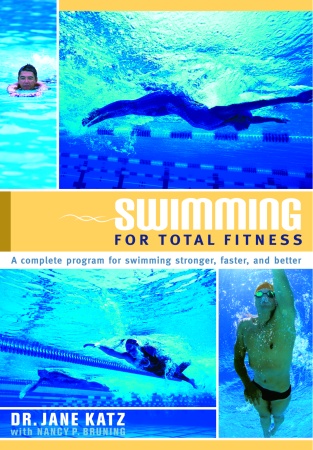
Smimming for Total Fitness

By Jane Katz, Ed. D.

…..

Part One: The Fundamentals of Swimming

Lesson One
Breathing, flutter kicking, bobbing

Lesson Two
Controlled breathing, prone float and recovery to a stand, prone glide and flutter kicking with assistance

Lesson Three
Crawl-stroke arm motion, prone glide with flutter kicking (unassisted).

Lesson Four
Crawl-stroke with rhythmic breathing

Lesson Five
Buoyancy check, deep-water tour treading

Lesson Six
Supine float with flutter kicking and recovery to a stand, deep-water treading

Lesson Seven
Supine sculling with flutter kicking, shallow surface entry

Lesson Eight
Elementary backstroke with flutter kick, sitting dive entry

Lesson Nine
Supine float with whip kick, elementary backstrocke with whip kick.

Lesson Ten
Windmill backstroke

......

http://www.randomhouse.com/ca...
Đăng nhập để trả lời
0
Lesson 1

This is among the most important lessons in the book, because it establishes the groundwork on which all the others are based. In this lesson, you’ll begin to learn how to breathe correctly, how to enter the pool safely, how to feel comfortable in the water, and how to bob and flutter kick.

Dry-Land/Prep Skills


This lesson begins by teaching you how to overcome what, for many people-regardless of their swimming ability-is the biggest stumbling block of all: incorrect breathing.

Breathing


Begin by sitting up straight. Inhale, expanding your lungs fully. Then exhale.

Remember how it feels to have your lungs really full-they should feel this way every time you take a breath in the water. As you do the following exercises, try to think about nothing except your mouth and nose, isolating them from the rest of your body.

HOW TO DO IT

The mouth: Pinch your nostril shut. Purse your lips and inhale strongly through your mouth-pretend you’re drinking through a straw. Then, keeping your lips pursed, exhale just as strongly through your mouth, as though you’re cooling off a cup of hot coffee. Hold a hand in front of your mouth to feel the expelled air. Repeat this ten times, breathing as deeply as you can.

The Nose: Cover your mouth and inhales deeply through your nose, as though you were smelling your favorite food cooking. Then exhale once again, expelling the air hard-as if there’s too much pepper in the dish and you now need to sneeze. Repeat this ten times, each time breathing as deeply as you can.

Now inhale deeply through both your nose and your mouth. Although you may be inhaling more through your mouth, use your nasal passage as well. Exhale strongly. Begin by pretending that you’re cooling off that coffee with your mouth first and then continue to sneeze from the pepper at the same time. Repeat this ten times.

All this deep breathing may make you a little lightheaded. That’s because you’re getting more oxygen than you need (in other words, you’re hyperventilating). Don’t worry, though-you won’t get that same dizziness in the water, because your body will be using the extra oxygen.

EXTRA TIPS

Make your inhale/exhale cycles as strong, even, and continuous as [possible; try to get the point where you can maintain an even stream of air for fifteen seconds. But build up to it gradually-you may find it harder than it sounds.

.....
Đăng nhập để trả lời
0
Lesson 1 * Page 20


.....

All new swimmers worry that the water will go into their mouths and noses. But remember this: the air flow you create when you blow out through both your nose and your mouth makes it physically impossible for the water to go up your breathing passages. As long as you’re breathing air out, no water can get in.

In the water, the nose is especially important. Most people will naturally exhale through the mouth underwater, but too many people don’t exhale properly out the nose at the same time. And a result the nasal passages tend to be a perpetual problem. Therefore, be especially aware of utilizing your nose as you do these breathing exercises.

If you have trouble exhaling through both nose and mouth simultaneously, begin by exhaling through your mouth alone for a second, before joining it with the nose. If that isn’t comfortable, try the reverse order-first the nose for a second, then nose and mouth together.

The main difference between your normal breathing and your breathing while swimming is in the volume of air that you take in and blow out.

Normally, you breathe very shallowly, using only a fraction of your total lung capacity. But when you’re swimming, you’ll inhale very deeply when your face is out of the water, through both your nose and your mouth. And when your head is under the water, you’ll blow out hard, also through both nose and mouth, creating that protective air flow as you do so.

These exercises are also the first step in building up your cardiovascular endurance. As you take these deep breaths now, you’re also strengthening and expanding your chest muscles and developing your lungs, which will help you later on in the water. Remember, even if you know how to swim, if your breathing isn’t comfortable, you can’t go very far- your swimming will be limited to only a few minutes.

.......
Đăng nhập để trả lời
0